


-
4 Westfield Rd,
Guildford
Surrey
GU1 1RR - 01483 574584
- sales@ews.uk.com
Select whether you need:

From the dropdown, choose the specific switch, socket, or spur type you require.

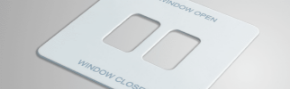
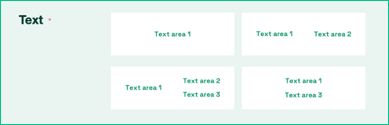
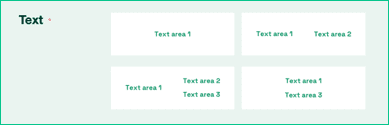
Select the layout option for the engraved text panel.
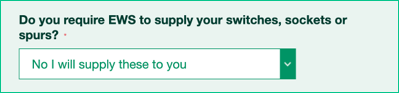
From the dropdown, choose one option:
No - I will supply these to you.
Yes - Please contact me to supply these.
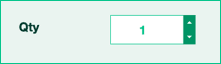
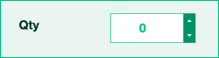
Type in how many accessory plates you need.
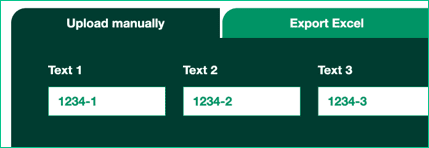
Manual entry: Enter your text into the box, then click Add for each item required.
Excel import: Go to the Export tab and download the template. Fill in the label text in the Excel file. Return to the Import tab, click select file and choose the file you just created and then click Import button.

Once all text is supplied and checked, click Add to Basket to complete your order.

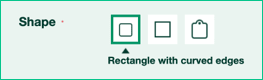
Select the shape you need for your label.

Pick the size of label required.

Options include:

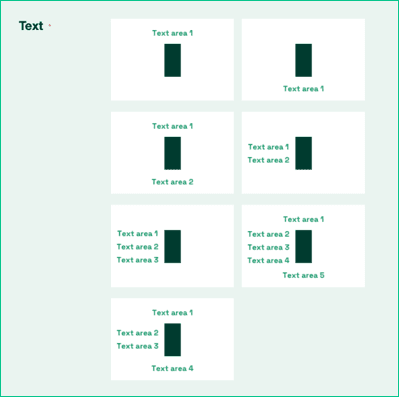
Choose how your text should appear on the label:
Note: Font size is chosen by EWS based on label size and text layout.
Type in how many labels you need.
Manual entry: Enter your text into the box, then click Add for each item required.
Excel import: Go to the Export tab and download the template. Fill in the label text in the Excel file. Return to the Import tab, click select file and choose the file you just created and then click Import button.

Once all text is supplied and checked, click Add to Basket to complete your order.

Select the shape you need for your label.
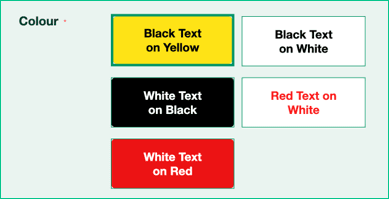
For plastic tie-on and plastic engraved labels, select the colour.
For stainless steel labels, skip this step.
Pick the size of label required.

Options include:

Choose how your text should appear on the label:
Note: Font size is chosen by EWS based on label size and text layout.
Type in how many labels you need.

Manual entry: Enter your text into the box, then click Add for each item required.
Excel import: Go to the Export tab and download the template. Fill in the label text in the Excel file. Return to the Import tab, click select file and choose the file you just created and then click Import button.
Once all text is supplied and checked, click Add to Basket to complete your order.
